An easy guide to understand White Balance
Have you ever played with the White Balance (WB) settings of your digital camera?
Maybe you’ve never heard of it or never realised your camera had this function.
That is because digital cameras come out of the factory with the Auto White Balance set as default.
As any other “Auto” function, Auto White Balance will do the adjustments automaticaly for you.
So let’s start from scratch:
White Balance built in camera only came to existence with digital photography. In the analogue days, we used to carry coloured filters with us to do the white balance manually.
While Balance settings are like the coloured filters. Each one has a colour and an intensity.
Why did we need filters before?
We used filters in the front of the lens to “correct” the light colour cast. That is, neutralise the colour cast. Make neutral tones appear neutral (white as white for example), without any colour tint.
Let’s try to understand it better and for that we need to understand the concept of Colour Temperature.
Colour temperature is measured in Kelvin. The Kelvin (a cousin of Celsius and Fahrenheit) is the primary unit of temperature measurement in the physical sciences.
Here is a chart that shows the colour temperature varying during the day and also the colour temperature of some light bulbs.
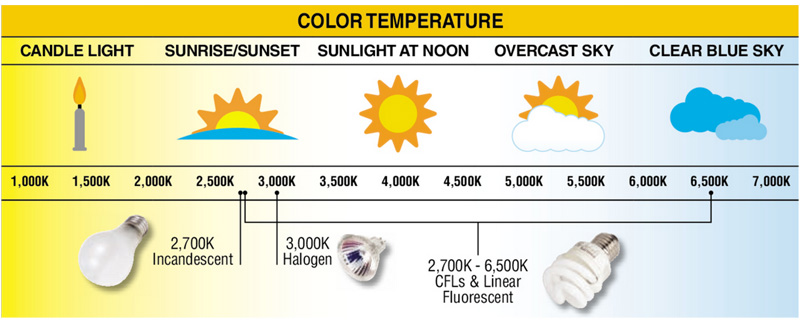
Do you remember the old days, before the new energy saving light bulbs, when house lights had a yellowish (warm) colour cast? These were tungsten or incandescent light bulbs and they glow yellow/orange.
As most films for analogue cameras were calibrated to take good photos at day light temperature, when exposed to other kinds of light, they would also capture the colour cast, leaving, in that case, everything yellow.
One way to “correct” the colour cast would be using flash, which mimics day light temperature.
Another way would be using coloured filters in the front of the lens to neutralise it.
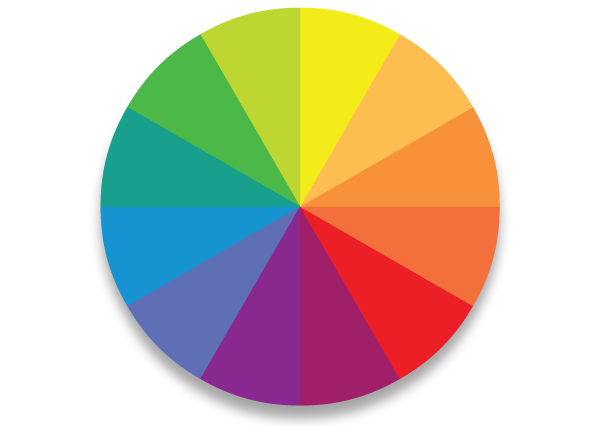
The colour of the filter you would chose to neutralise a colour cast would be the opposite on the colour wheel, for example, to neutralise yellow/orange colour cast, we would use a blue (cooling) filter.
If you leave your camera on Auto White Balance, the camera will adjust the filter for you, but keep in mind that what the camera is trying to do is neutralise colour cast.
If your intention is, instead of neutralising, capturing the colour cast, you must set the camera on Day Light white balance preset. That is because it will “behave” as a film camera without any filter (remember most films were calibrated to day light) and will capture the colours as you see.
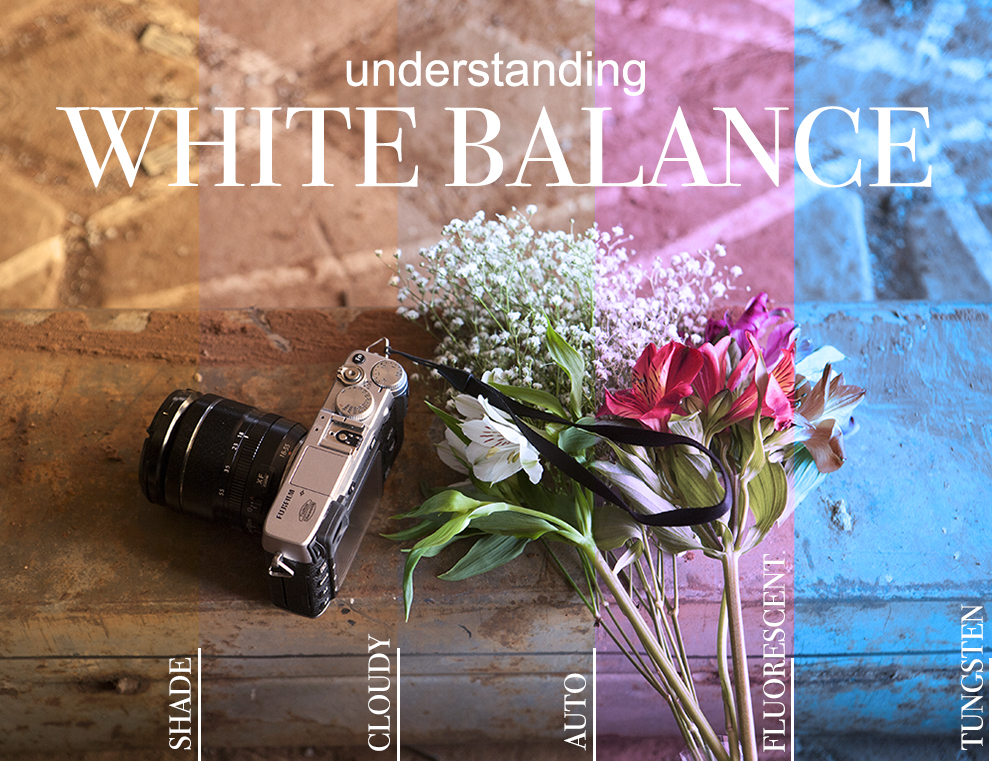
You can use the White balance presets in a totally free way, and I advise you to try around, photographing the same subject with all the presets to see what you get.
Results you can get by playing with the filters independently, not necessarily trying to “correct” any colour cast:
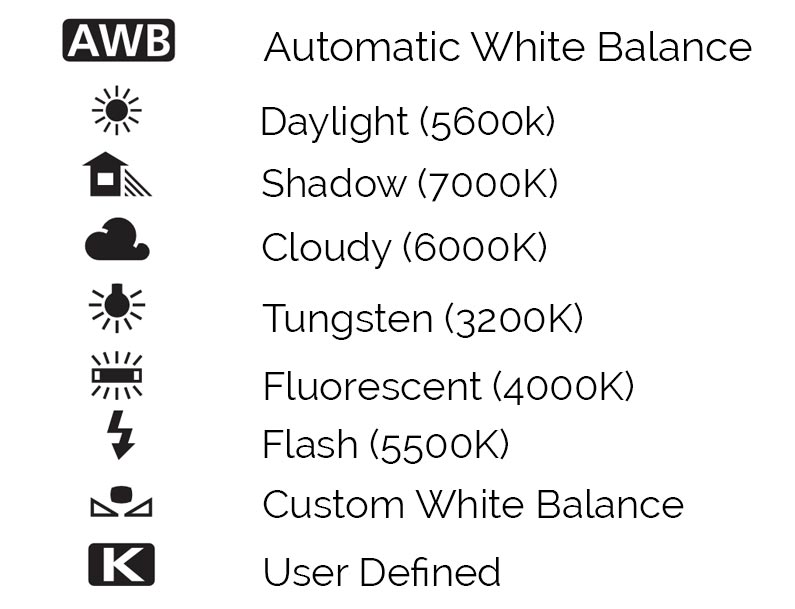
AWB – the camera will adjust white balance automatically.
Daylight- it will be like photographing with film without any correction.
Shadow: adds a warming filter
Cloudy: adds a warming filter
Tungsten: (or Incandescent): adds a cooling filter
Fluorescent: adds a pinkish/reddish filter
Flash: exactly like day light
Custom: you can preset your camera to neutralise neutral tones on mixed lighting conditions
K: you can choose the temperature in Kelvin
